Thursday 26 July 2018

Gym Leader #5: Fantina - Pokemon Diamond and Pearl

Image result for Pokemon Diamond and Pearl LogoImage result for relic badge pokemon

Gym Leader #5 Fantina - Ghost

Fantina has 3 Pokemon; Drifblim, Gengar & Mismagius. Her gym is a quiz based gym. There will be a signpost in the middle of the room, with a question on it. The answer is on a door, the doors with wrong answers on them will force you to battle a trainer. Get the question right, move on to the next floor.

Fantina's Gym Sign Post Questions:
Question 1 - 3 plus 5 plus 7? 15 (Right)
Question 2 - 12 plus 28? 40 (Middle)
Question 3 - 3 times 13? 39 (Left)
Question 4 - The first room's answer? 15 (Right)

Drifblim
Level: 32
Types: Ghost/Flying
Ability: Aftermath
Attacks: Ominous Wind, Minimize, Gust & Astonish
Weakness: Dark, Electric, Ice, Rock & Ghost
Strategy: Easy knock out for an Ice, Electric or Rock Type Attackers.

Gengar
Level: 34
Types: Ghost/Poison
Ability: Levitate
Attacks: Confuse Ray, Shadow Claw, Poison Jab & Spite
Weakness: Psychic, Ghost & Dark
Strategy: A fast super effective Pokemon will work best to avoid Confuse Ray.

Mismagius
Level: 36
Types: Ghost
Ability: Levitate 
Attacks: Confuse Ray, Psybeam, Shadow Ball & Magical Leaf
Weakness: Dark & Ghost
Strategy: A fast super effective Pokemon will work best to avoid Confuse Ray.

Once you defeat Fantina, you will get TM 65 Shadow Claw and the Relic Badge.

Image result for Pokemon - Fantina
Fantina

Friday 20 July 2018

Perfection #8 - Forza Motorsport 7

Image result for Forza 7 logo

Forza Motorsport 7 is the simulation racing game for the Xbox One, you race over 700 Cars around different track from all over the world. It's the basic racing game format. You can either race on your own, against Drivatars or multiplayer and watch the carnage unfold as Second Place knocks you off on the last corner on the last lap. After a rocky start, Forza Motorsport 7 has really come out of its shell; Forzathons kinda fun, DLC Car Packs are most of the time pretty good - still waiting for the Expansion Packs - the vehicle mechanics feels real and exciting.

There are 6 Championships in the Forza Driver's Cup, each with 30 or 33 Races and Events, which I completed. There are 62 Achievements, worth 1000 Gamerscore, but I was not able to get two of them (Skills to Pay the Bills & Underdog). I collected 710 Cars and completed 1,376 Races. I drove in the game for 132 Hours and 15 Minutes (5 1/2 Days of Racing). I spent a lot of time on Online with my mates, all that time wasn't just for completion. You spend a lot of time grinding for cars and credits.

Difficulty: 4/10
Time to complete: 55 Hours to 100% Forza Driver's Cup
Overall Enjoyment: 7/10

The load time between races, even if you stay in the same lobby, are ridiculously long. Waiting 3 minutes just to change Dubai to VIR is just stupid. I ended up playing the game for 18 days, according to my Xbox Stats Tracker; which was 13 days longer than my friends.

Thursday 19 July 2018

Gym Leader #4: Crasher Wake - Pokemon Diamond and Pearl

Image result for Pokemon Diamond and Pearl LogoImage result for Pokemon Fen Badge

Gym Leader #4: Crasher Wake - Water

Crasher Wake has 3 Pokemon; Gyarados, Quagsire & Floatzel. His gym may look difficult but it's rather simple. But it's a large swimming pool with buttons which can raise and lower the water level. With the water level raised and lowered, it will make the floating boards rise and fall which will allow you to make your way round the gym.

Gyarados
Level: 27
Types: Water/Flying
Ability: Intimidate
Attacks: Brine, Dragon Rage, Bite & Swagger
Weakness: Electric
Strategy: Easy knock-out for any Electric Type Pokemon.

Quagsire
Level: 27
Types: Water/Ground
Ability: Damp
Attacks: Slam, Mud Bomb, Mud Sport & Tail Whip
Weakness: Grass
Strategy: Easy knock-out for any Grass Type Pokemon.

Floatzel
Level: 30
Types: Water
Ability: Swift Swim
Attacks: Brine, Ice Fang, Pursuit & Swift
Weakness: Grass & Electric
Strategy: Avoid using Grass Types as Ice Fang will counter Grass Types. 

Once you defeat Crasher Wake, you will get TM 55 Brine and the Fen Badge.

Image result for Pokemon - Crasher Wake
Crasher Wake

Wednesday 18 July 2018

The Great Marsh - Pokemon Diamond and Pearl

Image result for Pokemon Diamond and Pearl Logo

In Pastoria City, in the north of the city, there is the Great Marsh. The Great Marsh is very similar to the Safari Zone from previous generations of Pokemon, you are able to catch Rare Pokemon without using your Poke Balls. You have to use Safari Balls, Baits and Rocks.

You cannot attack the wild Pokemon, you can only attempt to catch it or run away.

The Safari Ball works the same as an Ultra Ball or Great Ball, you throw it at the Pokemon in an attempt to catch it.

The Bait makes it so that Pokemon are less likely to run away but harder to catch.

The Rock makes it so that Pokemon are more likely to run away but more likely to be caught.

It's a bit of a gamble throwing Bait and Rocks, in my opinion, you are better off just using the Safari Balls which are given to you.

Before you enter the Great Marsh, you can go to the 2nd floor of the entry building to use binoculars to see a random Pokemon that will appear in one of the six areas within the Marsh. The rotating Pokemon are Croagunk, Skorupi, Carnivine, Roselia, Staravia & Golduck.

Pokemon you can catch in the Great Marsh;
Psyduck
Golduck
Azurill
Marill
Wooper
Quagsire
Bidoof
Bibarel
Starly
Staravia
Budew
Roselia
Hoothoot
Noctowl
Magikaro
Gyarados
Barboach
Skorupi
Croagunk
Carnivine

Image result for Pokemon - great marsh
The Great Marsh

Sunday 15 July 2018

Gym Leader #3: Maylene - Pokemon Diamond and Pearl

Image result for Pokemon Diamond and Pearl LogoImage result for Pokemon Cobble Badge

Gym Leader #3: Maylene - Fighting

Maylene has 3 Pokemon; Meditite, Machoke & Lucario. Her gym may seem complex but it's not that bad. You need to slide the walls to the side, which will allow you to walk straight to the Maylene. You need to slide the walls on the Right Side of the Gym first, then the Left Side of the Gym. Then you will be able to go to Maylene.

Meditite
Level: 27
Types: Fighting/Psychic
Ability: Pure Power
Attacks: Confusion, Meditate, Detect & Drain Punch
Weakness: Flying & Ghost
Strategy: Best to strike hard with Ghost and Flying Types, but it will use Detect a lot.

Machoke
Level: 27
Types: Fighting
Ability: Guts
Attacks: Brick Break, Leer, Foresight & Rock Tomb
Weakness: Flying & Psychic
Strategy: Don't inflict status as Guts will double it's Physical Attack Stat. Psychic and Flying is the best way to go.

Lucario
Level: 30
Types: Fighting/Steel
Ability: Steadfast
Attacks: Drain Punch, Force Palm, Metal Claw & Bone Rush
Weakness: Fighting, Ground & Fire
Strategy: Fire Types will be countered by Bone Rush, so Ground Types and Fighting Types will work the best against Lucario.

Once you defeat Maylene, you will get TM 60 Drain Punch and the Cobble Badge.

Image result for Pokemon Maylene
Maylene

Wednesday 11 July 2018

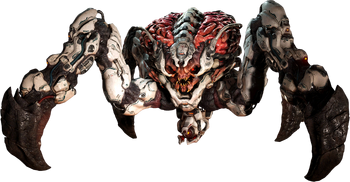
Who's Next? (Spider Mastermind Boss Battle) - DOOM

Image result for DOOM 2016 Logo

Defeat the Spider Mastermind - 25

You will encounter the Spider Mastermind at the end of Mission 13 - Argent D'Nur

You will jump down to the battlefield, where you'll witness Olivia Pearce being struck with demonic lightning and turning into the Spider Mastermind.

It has a large barrage of attacks:
Melee
Lasers
Ground Corruption

Melee - The Spider Mastermind will rush towards you and attempt to swipe at you with it's large claws/legs. You avoid this by jumping and sidestepping.

Lasers - The Spider Mastermind will unleash rotating lasers; you can avoid them by jumping over the first set of lasers, then crouching to avoid getting damaged on the second set.

Ground Corruption - The Spider Mastermind at one point will raise up several small pillars and begin to electrocute the ground with a wave of blue electricity. You'll have to jump onto a small pillar and then jump off the pillar when the blue electrical wave discharges into electricals beams, jump down to avoid being stabbed by the spikes coming out of the small pillar's tops.

The Spider Mastermind will only take damage in it's weak spot - the uncovered fleshing pink brain which is visible from the top the beast's head.

I found that the Super Shotgun and the Rocket Launcher worked the best, the BFG worked the best but I only had 3 shots of the weapon to use.

Spider Mastermind

Sunday 8 July 2018

Perfection #7 - Batman: The Tell-Tale Series

Image result for batman telltale season logo

Batman - The Tell-Tale Series follows Batman & Bruce Wayne in the attempt to rid Gotham City of Evil and Wrong-Doers. Batman discovers a highly organized crime wave which is going to strike against the city, the Children of Arkham, with their leader; The Lady of Arkham. Batman also has to deal with Two-Face, the Penguin and the Joker who are just out to make Batman & Bruce Waynes' lives a misery. 

There are 5 Episodes in the Series, each with a split-path ending as well as 5 major decisions to make throughout the story. There are 30 Achievements, worth 1000 Gamerscore, but they are all story related. Tell-Tale Series are just an easy to get gamerscore, with an enjoyable wander through a game which is pretty much just you watching a TV Series.

Difficulty: 3/10
Time to complete: 10 Hours to 100%
Overall Enjoyment: 8/10

Like all Tell-Tales Series Games, there aren't difficult to complete, yeah sure you are going to mess up one or two quick-time events which result in you getting killed, but apart from that, they are story games. They are really well put together and enjoyable to play.

Gym Leader #2: Gardenia - Pokemon Diamond and Pearl

Image result for Pokemon Diamond and Pearl LogoImage result for pokemon forest badge

Gym Leader #2: Gardenia - Grass

Gardenia has 3 Pokemon; Cherubi, Turtwig & Roserade. Her gym may seem annoying if you are not reading/listening what the Pokemon Trainers have to say, once you defeat each trainer, they give a hint to the location of the next trainer, there are 4 trainers in the gym. 

(Top Left / Bottom Left / Bottom Right / Top Right)

Cherubi
Level: 19
Types: Grass
Ability: Chlorophyll
Attacks: Grass Knot, Leech Seed, Safeguard & Growth
Weakness: Flying, Bug, Ice, Fire & Poison
Strategy: A strong flying or fire type will work best here.

Turtwig
Level: 19
Types: Grass
Ability: Overgrow
Attacks: Grass Knot, Razor Leaf, Withdraw & Reflect
Weakness: Flying, Bug, Ice, Fire & Poison
Strategy: Once Turtwig gets below 50% health it will start to use Withdraw and Reflect, it might be worth trying to burn it or poison it to help you. Flying and Fire Types are going to work the best.

Roserade
Level: 22
Types: Grass/Poison
Ability: Natural Cure
Attacks: Grass Knot, Magical Leaf, Poison Sting & Stun Spore
Weakness: Psychic, Ice, Flying & Fire
Strategy: No point attempting to inflict status because it will just heal itself; Full out power will work best, Fire and Flying are the way to go.

Once you defeat Gardenia, you will give you TM 86 Grass Knot and the Forest Badge.

Image result for pokemon gardenia
Gardenia

Saturday 7 July 2018

Honey Trees - Pokemon Diamond and Pearl

Image result for Pokemon Diamond and Pearl Logo

Once you have defeat the first gym and travelled to Floaroma Town. You will be introduced to Honey Trees. They look like normal trees, but they have yellow-y/orange leaves rather than green leaves. You are able to slap some honey on the base of the tree, doing this will attached wild Pokemon which will allow you to catch some Pokemon you can't really get anywhere else.

Honey can be found as an Item throughout the game, it be bought from the man in Floaroma Meadow after you have saved him from Team Galactic for 100 PokeDollars.

Honey Trees can be found in:
Route 205 (both North & South)
Route 206
Route 207
Route 208
Route 209
Route 210 (both North & South)
Route 211 (only East)
Route 212 (both North & South)
Route 213
Route 214
Route 215
Route 218
Route 221
Route 222
Shortcut around the Eterna Forest
Valley Windworks
Fuego Ironworks
Floaroma Meadows

Honey Tree Pokemon:
Wurmple
Silcoon
Cascoon
Combee
Burmy (Plant Coat)
Cherubi
Aipom
Heracross
Munchlax

Munchlax is a bit different to every other Honey Tree Pokemon. There are only four Honey Trees in the game where you can find Munchlax, which are random of every player. It will only be a 1% Chance of getting a Munchlax on one of the Munchlax Honey Trees, being between the levels of 5-15. Munchlax is the pre-evolution of Snorlax. The location of the Munchlax Honey Tree depends on the Trainer ID and Secret ID of the player; I shall put a hyperlink to Bulbapedia for more information on Munchlax Honey Trees.

Bulbapedia - Munchlax Honey Trees
https://bulbapedia.bulbagarden.net/wiki/Honey#Munchlax_trees

Image result for Pokemon Diamond and Pearl Honey Tree
Honey Tree

Friday 6 July 2018

Gym Leader #1: Roark - Pokemon Diamond and Pearl

Image result for Pokemon Diamond and Pearl LogoImage result for Pokemon Coal Badge

Gym Leader #1: Roark - Rock

Roark has 3 Pokemon; Geodude, Onix & Cranidos. His gym is simple, you don't even need to battle the two trainers.

Geodude
Level: 12
Types: Rock/Ground
Ability: Rock Head
Attacks: Rock Throw
Weakness: Fighting, Ground Ice, Water, Grass & Steel
Strategy: Just hit hard with a super effective move. If you picked Chimchar, it's worth evolving it into a Monferno to learn Mach Punch which will help out with this gym.

Onix
Level: 12
Types: Rock/Ground
Ability: Rock Head
Attacks: Rock Throw, Screech & Stealth Rock
Weakness: Fighting, Ground Ice, Water, Grass & Steel
Strategy: Hit hard and fast with super effective attacks.

Cranidos
Level: 14
Types: Rock
Ability: Mold Breaker
Attacks: Headbutt, Pursuit & Screech
Weakness: Fighting, Ground, Water, Grass & Steel
Strategy: It might be worth sending out a Pokemon just to hit it with moves like Screech or Growl to lower its defence or attack stats to give an easier time to a super effective Pokemon.

Once you defeat Roark, you will get TM 76 Stealth Rock and the Coal Badge.

Image result for Pokemon - Roark
Roark

Outnumbered? No Problem (Hell Guards Boss Battle) - DOOM

Image result for DOOM 2016 Logo

Defeat the Hell Guards - 25

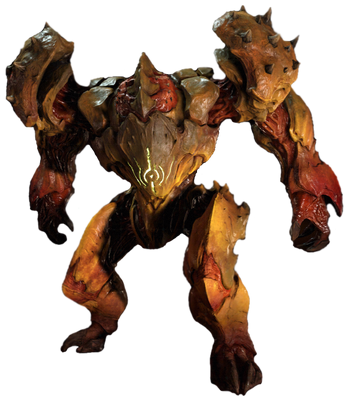
You will encounter the Hell Guards at the end of Mission 10 - The Necropolis

You will arrive at the giant doors, which you'll open and find yourself transported to a hellish arena.

The first Hell Guard has the ability to use a Force Field, when it is active you will be unable to damage it.

It has a large barrage of attacks:
Rush
Flamethrower
Mace
Staff

Rush - The Hell Guard will sprint towards you, attempting to slam against you. You can easily avoid the Rush Attach by sidestepping away.

Flamethrower - The Hell Guard can use is Flamethrower in one of two ways, a spinning giant 6-pointed star of flames which you can jump over or rotating with the star of flames. Or a chasing circle of flames, which you can jump over to avoid being burnt.

Mace / Staff - The Hell Guard will have both a Mace and a Staff, the Mace will be used a smashing weapon, with the Staff being used as a flame projectile weapon. Jumping and Sidestepping will help you avoid the attacks.

Once you have defeat the Hell Guard, two more will spawn. They can't use a Force Field but both of them have the ability to strike faster than before.

The Hell Guards have the ability to:
Rush
Mace
Staff

Rush - The Hell Guards will sprint towards you, attempting to slam against you. You can easily avoid the Rush Attach by sidestepping away.

Mace - Only one of the Hell Guards will have a Mace, it will be attempting to smashed down upon you, creating a flaming spread when it lands.

Staff - Only one of the Hell Guards will have a Staff, it will be attempting to burn you by shooting a ray or blasts of flames at you.

When one of the Hell Guards' health becomes low, the other will attempt to heal it. You can stop the healing process by attacking the Hell Guard who is healing the other.

I found the Plasma Rifle and Heavy Assault Rifle to work the best. Once there are two, I used the BFG to get a couple of heavy hits off on both of them. I also used the Super Shotgun, the Plasma Rifle and the Heavy Assault Rifle.

Hell Guard

Long Nights Forzathon - Forza Motorsport 7

Image result for Forza 7 logo

There are 3 Challenges in this Forzathon and the reward is the Happy Trail Driver Gear.

Challenge 1 - Win a Race in a 2016 Cadillac CTS-V Sedan at Night
(Any track at Night / 2016 Cadillac CTS-V Sedan)

Challenge 2 - Complete 2 Laps of Circuit de Spa-Francorchamps in a 1964 Ford Fairlane Thunderbolt at Night.
(Spa at Night / 1964 Ford Fairlane Thunderbolt)

Challenge 3 - Win a Race at Virginia International Raceway in a 2016 Porsche Cayman GT4 at Night.
(Virginia International Raceway at Night / 2016 Porsche Cayman GT4)

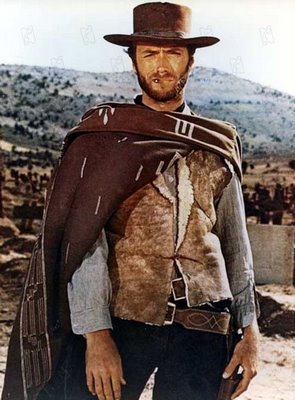
Image result for Man with no name
The Man with No Name

Wet Asphalt Forzathon - Forza Motorsport 7

Image result for Forza 7 logo

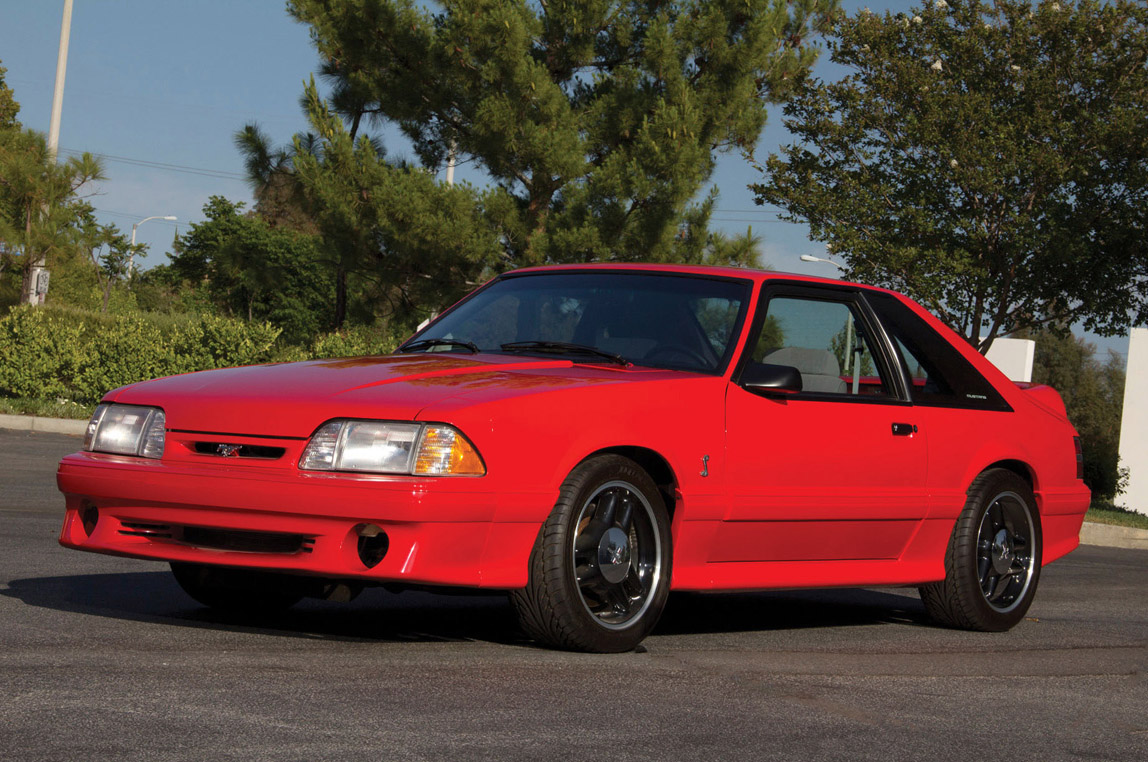
There are 2 Challenges in this Forzathon and the reward is the 1993 Ford SVT Cobra R Forza Edition.

Challenge 1 - Win a Race at Top Gear Full Circuit in the Rain.
(Top Gear Full Circuit in the Rain / Any Car)

Challenge 2 - Complete 3 Laps at Sebring Club Circuit in the Rain.
(Sebring Club Circuit in the Rain / Any Car)

The 1993 Ford SVT Cobra R Forza Edition is a Uncommon Rebirth Muscle Car.

Related image
Ford SVT Cobra R - 1993

Morning Jog Forzathon - Forza Motorsport 7

Image result for Forza 7 logo

There is 1 Challenge in this Forzathon and the reward is the 2011 BMW 1 Series M Coupe.

Challenge 1 - Complete 5 Lapps in a Sports Coupe Division Car.
(5 Laps of Any Track / Any Sport Coupe)

The 2011 BMW 1 Series M Coupe is an Uncommon Sport Coupe in A Class.

Image result for 2011 bmw 2 series m coupe
BMW 1 Series M Coupe - 2011

Wednesday 4 July 2018

Shoot it Until it Dies (Cyberdemon Boss Battle) - DOOM

Image result for DOOM 2016 Logo

Defeat the Cyberdemon - 25

You will encounter the Cyberdemon at the end of Mission 9 - Lazarus Labs.

You will arrive at the giant doors, which you'll open, then be dragged through by the Cyberdemon.

It has a large barrage of attacks:
Rocket Barrage
Rush
Melee
Laser Cannon

Rocket Barrage - The Cyberdemon will do one of two things, shoot at your with around 10 rockets from a rocket launcher, or he will shoot upwards, and make most of the floor to be covered by laser-guided rocket markers. You can avoid the Rockets by sidestepping, while you just have to not stand on a Guided-Rocket Marker.

Rush - The Cyberdemon will rocket propel itself towards, attempting to slam against you. You can easily avoid the Rush attack by sidestepping away.

Melee - The Cyberdemon will swing at you with it's strong muscular arms, he will only use this attack when he is close to you. If you are a fair distance away from it, he won't attempt to Melee.

Laser Cannon - The Cyberdemon will use he's Laser Cannon, you'll know when this is happening because it will begin a laser pointer, then suddenly discharge and emit a large powerful laser. This can be avoided by jumping and sidestepping away from the laser pointer stage of the attack.

Once you weaken the Cyberdemon and remove it's cyber-heart, the cyber-heart will explode and send you and the Cyberdemon to a more demonic version of the battlefield.

Now the Cyberdemon is faster and more agile. He's attack now include:
Rocket Barrage
Rush
Melee
Laser Cannon
Hell Wave
Demonic Sword

Hell Wave - The Cyberdemon will spawn a hallway of spikes, forcing you into a tight corridor. While in this hellish corridor, the Cyberdemon will doe one of two things. Shoot a barrage of rockets at you, or use he's Demonic Sword. You can avoid the barrage of rockets by jumping and sidestepping, while the Demonic Sword will emit 3 Hell Waves; you can avoid them by jumping the first, standing for the second and jumping for the third.

Demonic Sword - The Cyberdemon's Demonic Sword emits Hell Wave which you can avoid by jumping and standing to avoid getting hit by the Hell Waves. He will also use the Demonic Sword at close range which does double the damage of his normal Melee Attack.

Once you have defeated the Cyberdemon, you will be transported to another location in Hell.

I found that the Heavy Assault Rifle, Plasma Rifle & Rocket Launcher worked the best in the first stage, while the Rocket Launcher, Plasma Rifle, BFG & Chaingun worked best in his second stage.

Image result for DOOM 2016 Cyberdemon
Cyberdemon