Saturday 28 January 2017

Jager Bomb - Assassin's Creed III

Image result for AC3 LogoJager Bomb in Assassin's Creed III

After becoming fully Notorious, kill 10 Jagers before losing your notoriety - 20

DNA Sequence 5 - Memory 2

In the mission, you have to get rid of your notoriety. But if you don't get rid of any of the signs and just become slaughtering enemies around the map. Jagers will be patrolling as well as normal guards. Jagers are a little bit more tougher than normal guards.

Jager Bomb is a reference to the alcoholic drink of a Jagerbomb - which is bomb shot which is mixed with Jagermeister.

Jager Infantry Guards

Eye Witness - Assassin's Creed III

Image result for AC3 LogoEye Witness in Assassin's Creed III

Witness a predator killing an enemy - 10

This can be done throughout the game in the Frontier.

Best place to do this is in Packanack. Towards the left near the lake, slightly north of it; there are two guards who continuously are patrolling round there. Bobcats are also all over the hunting area. If you just follow the guards around in the trees, a bobcat will come and hunt down one of the guards in no time at all. Just watch the bobcat eat/kill one of the guards.

Image result for bobcat
Bobcat

Prince of Thieves - Assassin's Creed III

Image result for ac3 logoPrince of Thieves in Assassin's Creed III

Loot a convoy without killing any of its guards - 10

This can be done throughout the game. Convoys spawns throughout the Frontier.

Starting at the Fort, in Monmonth, in the Frontier. Run out of the fort entrance, and more than likely there will be convoy. Instead of killing the guards, select unarmed and continue to beat the guards up. Then loot from the chest in the back of the convoy trailer.

Prince of Thieves is a reference to Robin Hood: Prince of Thieve where Robin Hood stealing from the convoys stealthfully.

Image result for Prairie Schooner
Prairie Schooner Wagon

Thursday 26 January 2017

Kidd Gloves - Assassin's Creed III

Image result for ac3 logoKidd Gloves in Assassin's Creed III

Uncover the mystery of Oak Island - 30

Firstly, you must have found all the Peg Leg Trinkets.

Secondly, you must have completed the 4 Naval Missions which are given for finding all the Peg Leg Trinkets;
Fort Wolcott
Dead Chest's Treasure
The Ghost Ship
The Mad Doctor

Afterwards, you have the ability to go to Oak Island.

SPOILERS!

Travel there via the Aquila. Follow Mr. Faulkner towards the main area. Then you will have to go to the 4 points and match up the leylines so that the rings are over rocks and trees. Once the leylines are matched up, a Thunderbird Outline will appear on the ground - then 3 wolves will appear, kill them and then return to the Thunderbird. You and Mr. Faulkner will blow up the ground with barrels of gunpowder and reveal an underground area. Parkour your way through the cave and collect Captain Kidd's Rings - The Shard of Eden. The cave will then begin to collapse and you will escape. Mission Complete.

Image result for Captain Kidd
Captain William Kidd

Tumblehome - Assassin's Creed III

Image result for assassin's creed 3 logoImage result for assassin's creed 3 - tumblehome

Upgrade the Aquila - 10

The Aquila, is the naval ship that Connor is able to command throughout the game. Upgrades to the ship can be bought from the book at the Harbormasters table.

Upgrades you can buy;
Wooden Hull Reinforcements - £13,000
Extra Cannon (Hull-Mounted) - £2,500
Heat Shot - £19,000
Grapeshot - £17,000
Improved Rudder - £11,000
Piercing Round - £9,000
Naval Ram - £8,00

You only have to buy one for the achievement.

Tumble is a reference to the narrowing of a ship's hull with a greater distance above the water line.

Image result for The Octavius
The Octavius

Wednesday 25 January 2017

Predator - Assassin's Creed III

Image result for assassins creed 3 logoPredator in Assassin's Creed III


Hang 5 Enemies by using Rope Darts - 10

While in a tree, target an enemy and shoot them with a rope dart, then push back on the left analogue stick. Doing this will make Connor, jump back of off the tree branch, raising the enemy up, hanging him. Do this is 5 times.

This can be done throughout the game.

This is a reference to the Sci-Fi Film Classic - Predator. Where the Predator is able to skin a human and hang them from a tree.


Related image
Johyo - Rope Dart

Monday 23 January 2017

Circus Act - Assassin's Creed III

Image result for ac3 logoImage result for ac3 circus act

Kill 15 Guards with a Single Cannon Shot - 10

Mission: DNA Sequence 10 - Memory 3

You can get this achievement while commanding the cannon in the Battle of Lexington and Concord. You need to bunch a couple of guards up to get this achievement. If you fail, you can reload the Checkpoint.

Related image
British Military 10-Pounder Cannon

Tuesday 17 January 2017

Whit's fur ye'll no go by ye! - Assassin's Creed III

Image result for assassin's creed 3 logoImage result for assassin's creed 3 whit's fur ye'll no go by ye!

Block a firing line 5 times by using a human shield - 10

This can be done throughout the game. While fighting soldiers, musket-wielding soldiers will occupationally form a firing line and attempt to shoot you. You can block the musket rounds with a human shield, with is done by grabbing a soldier, by pressing A, before they shoot. The human shield will soak up the bullets instead of you.

"Whit's fur ye'll no go by ye!" Is a old Scottish saying, originally from the American Revolution, with Scottish man fighting as Redcoat and Bluecoat Soldiers. It means "What's meant to happen will happen".

Image result for red coat firing line
Redcoat Firing Line
   

Spit Roast - Assassin's Creed III

Image result for logo assassin's creed 3 Image result for spit roast assassin's creed 3

Perform a double assassination using a musket - 20

You can do this at any point in the game, I found it the easiest in DNA Sequence 2 - 2; when you are collecting the small chest as Haytham Kenway. Firstly, find a musket rifle, these can be found through out this area usually on a rifle rack or from dead soldiers. Sneak up behind  a pair of soldiers, and press the X Button, it will automatically assassinate the guard by stabbing him with the bayonet and shooting the second guard with the rifle, shooting thrigh the first one.

If you fail, you can reload the checkpoint.

Charleville 1866.jpg
Charlesville Musket Model 1766

Wednesday 4 January 2017

Portrait of a Lady - Portal 2

Image result for portal 2 logoImage result for portal 2 portrait of a lady achievement

Find a hidden portrait - 10

In Chapter 7, after completing the first Propulsion Gel Test Chamber, look to the left to see a white panel where you can place a portal; there is a white panel on the right - place the other portal here. Through the portals, you will arrive at an office with a portrait of Cave Johnson and Caroline on the wall.

The woman is named Caroline, who later becomes GLaDOS.

Image result for portal 2 portrait of a lady achievement
Portrait of Cave Johnson and Caroline

Ship Overboard - Portal 2

Ship Overboard in Portal 2

Discover the missing experiment - 10

At the place where the second lot of vitrified doors, continue through the corridor and through a door to the left. You will come into a ship set off place, and at the end of the catwalk there is a life ring which says Borealis.

The Borealis is a reference to Half-Life 2: Episode Two - The Borealis is an Aperture Science research vessel.

Image result for The Borealis
The Borealis

Schrodinger's Catch - Portal 2

Schrodinger's Catch in Portal 2

Catch a blue-painted box before it touches the ground - 20

In Chapter 6, there is a test chamber using Repulsion Gel. You have to portal the Repulsion Gel into the glass box, from above. The cube will before covered in the gel and bounce uncontrollably across the test chamber. I recommend saving before you portal in the Repulsion Gel. If you drop it, restart and hope it bounces towards you.

This achievement is a reference to Schrodinger's Cat. I paradox devised by Erwin Schrodinger, explaining how an object can be in two different states at the same time, you cannot know what state it is until you have seen it. So a cat is trapped in a box, with a radioactive source - the cat can be dead and alive at the same time because you cannot see the cat's state until you open the box.

Image result for schrodinger's cat
Schrodinger's Cat

Door Prize - Portal 2

Image result for logo portal 2Door Prize in Portal 2
Examine all the vitrified test chamber doors - 20

In Chapter 6, after your access the old abandoned facility and your stumble upon Cave Johnson's voice recordings, you will go up a lift. Turn around to face the back wall, towards the right side there are 3 vitrified doors Press your action button on all of the yellow voice boxes next to each door.

After collecting GLaDOS in potato form, there is a little office on the left side of the room. There is hidden sliding door behind a filing cabinet; click on all 3 of the vitrified door's voice boxes.

Image result for logo portal prize door
VITRIFIED Door

Good Listener - Portal 2

Image result for portal 2 logoImage result for portal 2 good listener

Take GLaDOS' escape advice - 5

Towards the end of Chapter 4, you will get the opportunity to escape with Wheatley. GLaDOS will reveal the "final test", travel across the Hard Light Bridge and walk towards the open door. You will then be killed by GLaDOS.

Image result for GLaDOS portal 2
GLaDOS

Smash TV - Portal 2

Image result for portal 2 logoImage result for portal 2 smash tv

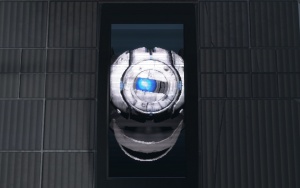
Break 11 Test Chamber Monitors - 75

Test Chamber 1 - Monitor 1
Test Chamber 2 - Monitor 2
Test Chamber 3 - Monitor 3
Test Chamber 4 - Monitor 4
Test Chamber 5 - Monitors 5 & 6
Test Chamber 6 - Monitor 7
Test Chamber 11 - Monitor 8
Test Chamber 12 - Monitor 9
Test Chamber 15 - Monitor 10
Test Chamber 16 - Monitor 11

Test Chamber Monitors can be destroyed by objects being smashed against it, throwing yourself, being shot by turrets or lasers.

Test Chamber 1:
Travel upwards, portalling the Excursion Funnel towards the Frankenturret. Then portal down to the lower level. Then creating to portals so that the Frankenturret can fall forever, then placing another portal on the opposite wall so that the Frankenturret will smash the Test Chamber Monitor.

Test Chamber 2:
Collect a Cube using the Excursion Funnel, then placing a portal so that the Cubeis forced against the roof with the Excursion Funnel. Place a portal on the wall opposite the Test Chamber Monitor, letting the Cube fall and smash the Monitor.

Test Chamber 3:
Collect the Frankenturret and force it to push against the roof with an Excursion Funnel, then place a portal on the opposite wall to the Monitor, allowing the Frankenturret to fall and smash the Monitor.

Test Chamber 4:
Sneak past the Turret, then pick it up and place it opposite the Monitor, it will shoot it and destroy it.

Test Chamber 5:
Firstly, collect the Cube with an Excursion Funnel. Then place a portal on the opposite wall to destroy the first Monitor in that room. Then collect another Cube and placing a portal on the diagonal facing surface, opposite the Monitor, the Cube will then destroy the second Monitor, as well as landing on the Pressure Plate.

Test Chamber 6:
As soon as your go into the Test Chamber, jump on the Aeiral Faith Plate, throwing yourself against a Monitor, destroying it.

Test Chamber 11:
Continue through the test chamber as normal, but place the Discouragement Redirection Cube in the path of the laser, then place a portal on the surface it redirecting the laser. Then place the other portal as close as you can to the Monitor. Use the Discouragement Redirection Cube to shoot the Monitor with the laser, destroying it.

Test Chamber 12:
Continue through the test chamber as normal, but when you get past the laser grid with the Discouragement Redirection Cube, place a portal against the wall where the laser is firing against, then place the other portal on the opposite wall. Then fire the laser at the Monitor, destroying it.

Test Chamber 15:
Straight off, place a portal on the floor with the other capturing the Excursion Funnel, forcing yourself against the roof. Then place a portal on the wall opposite to the Monitor, throwing yourself at the Monitor, destroying it.

Test Chamber 16:
Continue through the test chamber as normal, but when redirection the Repulsion Gel, only throw two of the three Turrets off the edge. Then portal across to the than panel using the Excursion Funnel. Then take the surviving Turret and create a portal which forces the Turret against the roof with an Excursion Funnel, then place the other portal on the wall opposite the Monitor, then turret will then fall and smash the Monitor.


Image result for wheatley's TV portal 2
Test Chamber Monitor

You Made Your Point - Portal 2

Image result for portal 2 logoImage result for portal 2 you made your point

Refuse to solve the first test in Chapter 8 - 5

At the beginning of Chapter 8, you will forced to complete the first of Wheatley's test chambers. In the test you have to press a button, and that it... If you wait for about a minute you will get the achievement. Do not press the button or stand on the pressure pad.

Image result for wheatley portal 2
Wheatley

Sunday 1 January 2017

Tie Dye Outfit - Minecraft

Image result for minecraft xbox one edition logoImage result for minecraft tie dye outfit achievement xbox one

Dye all 4 unique pieces of Leather Armour - 15

You will need 24 pieces of Leather in total; 8 for the Tunic, 7 for the Trousers, 5 for the Helmet and 4 for the Boots. You get Leather by killing Cows. Now craft the Leather Armour. To dye your leather armour you are going to need some dyes:

White - Bonemeal - Grinding up Bones on a Craft Table, Bones are gotten by killing Skeletons.
Black - Black Sheep or Ink Sacs can be collect from killing Squids.
Grey - Grey Sheep or 1 Ink Sac and 1 Bonemeal.
Red - Roses.
Pink - Pink Tulips or 1 Red Dye and 1 Bonemeal.
Yellow - Dandelions.
Orange - Orange Tulips or 1 Yellow Dye and 1 Red Dye.
Green - Putting Cactus in a Furnace.
Lime - 1 Green Dye and 1 Bonemeal.
Blue - Lapis Lazuli which can be mined with a Stone Pickaxe.
Light Blue - Blue Orchid or 1 Blue Dye and 1 Bonemeal.
Cyan - 1 Blue Dye and 1 Green Dye.
Purple - 1 Blue Dye and 1 Red Dye.
Magenta - 1 Purple Dye and 1 Pink Dye.
Brown - Brown Sheep or Cocoa Beans.

To dye Leather Armour, all you have to do is hover over the piece of Leather Armour with the dye in your Inventory, this is dye the Leather Armour piece.

This achievement/trophy can be gotten on all versions of Minecraft.

Tie Dye is a reference to the mid-1960's craze of tie-dyeing t-shirts. The t-shirt would be twisted and folded with rubber bands or string and then stirred into a vat of fabric dyes, revealing a the t-shirt to have large groovy circular patterns,

Image result for Minecraft Dyed Leather Armour
Full Set of Blue Dyed Leather Armour